These Tips Are For Quick Fixes
They are not the techniques I use when repairing woodwind instruments in my shop.
These repair tips should only be used in the event of an emergency. They do not replace professional maintenance and repair. Use the tips for help when you are on the road or if you cannot get your instrument to a qualified woodwind repair shop.
Six Things Needed For Quick Repairs
- Plastic wrap (Saran Wrap)
- Scotch tape
- Rubber bands
- Small screwdriver
- Lighter fluid
- Plain paper
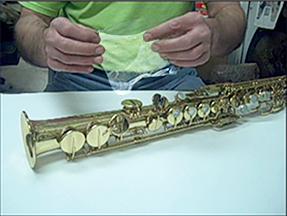
Plastic wrap can be used when the skin of a pad is ripped or becomes loose and starts to fall out. Wrap the plastic around the key cup and then tie a knot on top of the key cup.
Scotch tape can be used to reset a cork in place or layers of scotch tape can be used if cork is missing. If it gets messy remove the tape and try again to fill in where the cork should be.
Rubber bands can be used if springs break. Attach a rubber band to the key and fasten it to the horn where it will not interfere with other keys.
If the keys are silver plated or solid silver remove the rubber band right after playing to prevent etching onto the silver.
A small screwdriver can be helpful if a key is binding (sticking): Back its screw off ¼ to ½ turn.
Never use pliers on woodwind instruments. If you notice a bent key, bend it back by hand. Never use pliers to bend a key!
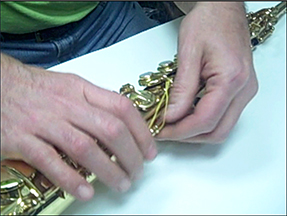
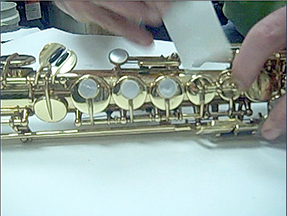
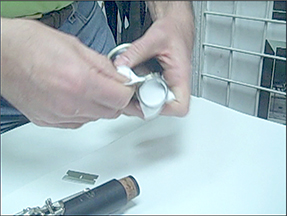
For sticky pads on saxophones
Use Ronson or Zippo lighter fluid - the chemical name is naphtha. Lighter fluid will clean pads and tone holes when used as follows:
Cut several strips of clean paper. Pour a bit of lighter fluid on a strip of paper. Place the paper between the pad and the tone hole and then press down on the key. Twist and pull paper out. Do this quickly because the lighter fluid will evaporate. Repeat this procedure two or three times. After this the pad should not stick.
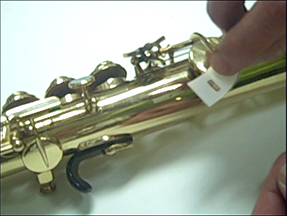
To prevent G# and low C# pads from sticking
When placing a saxophone in its case, place a clean strip of paper between the G# tone hole and the pad. This should be done for the low C# tone hole also. Never use dollar bills to clean sticky pads on saxophones. Bills are not clean. They are full of ink and oil from being handled.
To clean sticky pads on a flute, clarinet or oboe use Yamaha Powdered Paper.
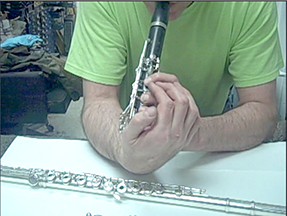
Quick test for leaks on clarinet
Close three holes in playing position on the upper joint. Suck air out of upper joint to create a vacuum. If the suction holds, the pads are sealing. Do this with the bottom joint as well. If suction holds for one second and dies off you may need to have a pad or two replaced. If there is no suction at all you probably need to have the instrument serviced. Check for cracks in the bore by looking through the bore at a light.
Cracks occur in clarinets when the joint rings become loose. Make sure the rings are tight before putting the clarinet together. You should not be able to remove joint rings with your hand. They should be tight to the instrument. Never leave an instrument in a cold environment.
Do not blow hot air into a cold wooden instrument. Allow the instrument to warm to room temperature before playing; for at least one half hour.
Common problems for clarinets
The Bb bridge key sometimes gets bent when the clarinet is put together.
On the upper joint, the A and Ab adjustment screw is too tight and keeps the Ab key open.
On the lower joint, C and B adjustments go out very often. Take up the space on C crowfoot with a layer or two of scotch tape.
Quick test for leaks on flutes
On the main body of the flute, close all keys with two hands in playing position (if hands are too small have another person lend a hand). Place the palm of your hand on bottom borehole of flute and suck air out to create a vacuum with your mouth.
If vacuum holds, the pads are sealing. If the flute is not playing it probably needs a professional adjustment in the shop.
Test the foot joint and head joint in the same manner. If vacuum dies off slowly or quickly you probably need to have a pad or two replaced. If there is no suction at all the instrument may need to have several pads replaced.
Things to keep in mind
Foot joint and head joint should fit tight on the main body of the flute. There should be no wiggle on the foot joint when connected to the main body of the flute.
If high notes are difficult to play the head cork may need to be replaced. This should be done once every year.
Common causes of damage to woodwind instruments
After placing instrument in case BE SURE to zip case or close latches. Damage occurs often when instruments fall out of their cases.
Instrument should be secure in the case. There should be no movement of instrument in its case. Use bubble wrap or a towel to prevent horn from moving inside the case.
The most common cause of flute damage is when the instrument is placed on a couch or bed. Flutes reflect the material they are placed upon. Players do not see their flutes and then sit on their instruments . . . ouch!
Plastic hooks on case straps should be replaced with metal key rings because plastic hooks often break. Also, pot metal or cast metal hooks break on heavy cases.
Neck straps with raw plastic hooks tend to break when holding heavier instruments such as tenor and baritone saxophones. Look for straps that have plastic shielding around the metal hooks.
Never pick up a saxophone by the neck. Never lift a flute by its head joint, always pick it up by the barrel on the main body. Pick up a clarinet by the bottom joint.
Brass is a soft metal. Treat all instruments as though they were made of glass when they are in the case and out of the case. Choose hard cases rather than soft bags for better protection. Also, place cases on the floor, never on tables, chairs, piano tops etc.